Can You Reapply Automotive Paint Coatings?
Table of Contents
- Can You Reapply Automotive Paint Coatings?
- Understanding Ceramic Coating Lifespan and Durability
- Signs Your Coating Needs Reapplication
- Ceramic Coating Refresh vs. Reapply: What's the Difference?
- How to Remove Old Ceramic Coating From Your Car
- Step-by-Step Process for How to Reapply Ceramic Coating
- Common Mistakes When Reapplying Coatings
- DIY vs. Professional Reapplication: Cost and Quality Considerations
- Frequently Asked Questions
Last Updated: October 9, 2026
Can You Reapply Automotive Paint Coatings?
Yes, you can reapply automotive paint coatings. The real question is whether you should, and how. The answer depends on your coating's condition, the protection type, and whether you want to restore it or start fresh.
Most coatings degrade as UV exposure, oxidation, and environmental contaminants break down the protective layer. When that happens, you have two paths: refresh what's there or remove it completely and reapply.
Understanding Ceramic Coating Lifespan and Durability
Ceramic coatings typically hold their protective properties for 2-5 years under normal conditions, though climate, maintenance, and product choice affect that. In harsh environments like Arizona's intense sun and heat, they degrade faster.
The coating's durability depends on several factors:
- UV exposure, Direct sunlight breaks down the nano-coating layer over time
- Water beading, When water stops beading on your paint, the hydrophobic properties are fading
- Surface contamination, Iron remover residue, brake dust, and tree sap accelerate degradation
- Curing time, Coatings need proper curing (usually 48-72 hours) to reach full hardness
Guardian Automotive Coatings' hybrid resin coating maintains over 99% integrity after 2,000 hours of UV and moisture exposure, meaning fewer reapplications and longer protection in harsh conditions.
Signs Your Coating Needs Reapplication
"Look for lost beading" is unreliable: a coating clogged with mineral deposits, road film, or wax residue can look dead while remaining fully intact underneath. Before spending a weekend stripping and reapplying, run objective tests to separate a dirty coating from a failed one.
First: Decontaminate, Then Re-Test
A coating that beads poorly is often just contaminated. Wash with pH-neutral soap, apply iron and tar removers, then do a chemical decontamination wash. Re-test after that: many "failed" coatings recover most of their beading once the top layer of contamination is gone. If performance returns, you need maintenance, not reapplication.
Objective Diagnostic Tests
Water contact angle. On a clean, leveled horizontal panel, place a drop of distilled water from a pipette and photograph it from the side against a ruler or printed protractor.
The baggie test. Place your hand inside a thin plastic sandwich bag and run your fingertips lightly across a clean, dry panel.
Solvent wipe test. Apply isopropyl alcohol (70% or higher) to a microfiber towel and wipe a 6-inch section.
Sheeting test. Pour a slow, steady stream of water across a vertical panel. A healthy coating sheets water off in a tight, fast-moving curtain.
Failure Signs That Do Require Reapplication
- Patchy behavior. Beading is strong on the roof but gone on the hood and fenders, usually meaning the coating was applied too thin there or damaged by a specific contaminant.
- Bonded water spots that survive decontamination. If mineral etching has reached the clear coat, no top-up will fix it.
- Visible oxidation or clear coat dullness under the coating. UV protection has already failed and the paint beneath is being attacked.
- Coating lifting at edges or in high-flex areas. Once a coating releases from the substrate, adding more product on top cannot re-bond it.
The Decision Rule
If decontamination restores beading, the coating is alive, so maintain it. If contact angle has dropped below roughly 70-80 degrees, the baggie test still feels rough after decontamination, or failure is patchy, the coating is done and reapplication is the correct path. This test-first approach prevents the most common waste in this hobby: stripping a perfectly good coating because it looked dull on a dirty car.
Ceramic Coating Refresh vs. Reapply: What's the Difference?
These terms sound similar but describe different processes.
A refresh applies a thin topcoat over your existing ceramic coating, restoring some hydrophobic properties and gloss without removing the old coating. It works only if the underlying layer is still bonded and hasn't failed completely.
A reapplication removes the old coating entirely and applies a fresh layer from scratch, requiring full surface preparation, decontamination, and paint correction. It's more labor-intensive but delivers superior results.
Choose a refresh if your coating still beads reasonably well with only minor gloss loss.
How to Remove Old Ceramic Coating From Your Car
Removing old ceramic coating requires patience: you can't just wash it off, so removal involves chemical and mechanical methods.
Clay bar treatment. A clay bar removes surface contaminants and breaks down the coating's outer layer.
Solvent application. Specialized ceramic coating removers dissolve the nano-coating.
Polishing and buffing. After solvent treatment, machine polishing removes remaining coating residue.
Degreaser wash. After removal, wash the entire vehicle with a degreaser to eliminate all solvent residue.
The entire removal process typically takes 4-8 hours for a full vehicle, depending on coating thickness and your experience level.
Step-by-Step Process for How to Reapply Ceramic Coating
Reapplying automotive paint coatings requires methodical preparation and careful application. Rushing any step compromises the final result.
Surface Preparation and Decontamination
Start with a completely clean surface: wash with pH-neutral soap and water, then dry with a microfiber towel to prevent water spots.
Iron remover treatment. Spray iron remover on the paint and let it sit for 5-10 minutes.
Clay bar decontamination. Use a clay bar with lubricant to remove embedded contaminants, working in 2-foot sections with light pressure and rinsing each section afterward.
Final solvent wipe. Use isopropyl alcohol on a clean microfiber towel to remove remaining residue, ensuring maximum surface tension for coating adhesion.
Paint Correction and Buffing
If your paint has swirl marks or oxidation, address these before coating. The coating will lock in existing imperfections.
Assess paint condition. Look at your paint under bright light at different angles and identify swirl marks, scratches, or oxidation, which need correction before coating application.
Machine polishing. Use a dual-action polisher with a polishing pad and compound. Work in overlapping sections, applying light-to-medium pressure.
Final buffing. After polishing, use a finishing pad with a lighter compound to refine the surface, creating the smooth base ceramic coating bonds to most effectively.
Application and Curing
Apply the coating in a cool, dry environment: 60-75°F and humidity below 50% is ideal.
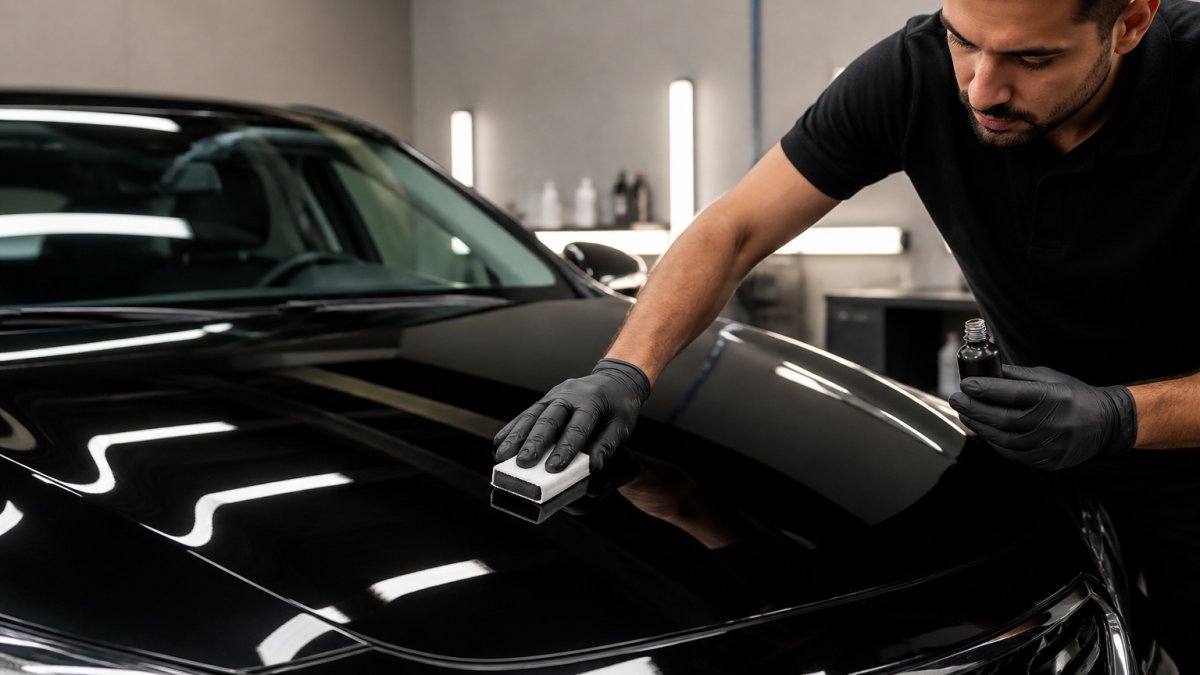
Coating application. Apply the ceramic coating with an application pad in straight lines or circular motions per product instructions.
Buffing residue removal. After 10-15 minutes (check product instructions), buff away excess coating with a clean microfiber towel to prevent hazing.
Curing time. Do not expose the vehicle to water or direct sunlight for 48-72 hours. The coating needs this time to fully harden and develop its protective properties. Premature exposure weakens the bond and reduces durability.
Common Mistakes When Reapplying Coatings
Most reapplication failures come from skipped steps or poor technique.
Skipping decontamination. Applying coating over contaminated paint creates poor bonding. The coating may peel or fail in patches.
Using old or expired coating. Ceramic coating formulas break down over time. Old product may not cure properly or achieve full hardness.
Insufficient surface preparation. Skipping paint correction leaves swirl marks and oxidation visible under the new coating, locking these imperfections in permanently.
Over-applying coating. Too much product in one application causes hazing and uneven curing. Thin, even layers work better.
DIY vs. Professional Reapplication: Cost and Quality Considerations
Most guides dodge this decision with "it depends." Here is a concrete framework: what each path costs, what each path risks, and when one clearly wins.
What DIY Actually Costs
A one-time DIY reapplication kit for a mid-size sedan or SUV requires consumables and reusable tools:
- Coating product: $60-$200 depending on brand and volume (a 30ml or 50ml bottle usually covers one vehicle).
- Iron remover and tar remover: $20-$40 combined.
- Clay bar or clay mitt plus lubricant: $25-$50.
- Compound and polish: $30-$60.
- Dual-action polisher (reusable): $120-$250.
- Polishing pads, applicator pads, and microfiber towels: $40-$80.
- Isopropyl alcohol and spray bottles: $10-$20.
If you already own a polisher and pads, marginal cost drops to roughly $150-$300 per reapplication. If not, the first job carries the full tool investment, and later jobs are much cheaper.
What Professional Reapplication Costs
Professional pricing varies by vehicle size and coating tier. High-end packages often include a warranty, a real component of the value.
The Hidden Costs of DIY
- Time. A proper strip, decontamination, correction, and reapplication is realistically 8-16 hours of focused work, often split across two days because of curing windows.
- Risk of paint damage. A dual-action polisher used with too much pressure, too aggressive a pad, or too long a dwell time can burn through clear coat, which is finite and not replaceable without repainting.
- Curing environment. Coatings need a dust-free, temperature-controlled space; a garage that is too cold, too humid, or dusty will produce a compromised finish.
- Redo cost. If the coating flashes wrong, cures unevenly, or gets contaminated, you may have to strip and start over, buying more product and losing another weekend.
The Hidden Value of Professional Work
- Paint thickness measurement. A professional uses a paint depth gauge before polishing, the single best protection against burning through clear coat. Most DIYers never measure.
- Correction capability. Multi-stage correction to remove deeper defects requires skill and equipment most owners lack.
- Controlled environment and warranty. A professional bay controls temperature, humidity, and dust, and many installers back their work with a written warranty tied to maintenance requirements.
When to DIY vs. When to Hire a Pro
DIY makes sense when:
- Your paint is in good condition and needs only light correction.
- You already own a polisher and are comfortable using it.
- The vehicle is a daily driver where a small imperfection is acceptable.
- You have a clean, temperature-controlled space and 1-2 days available.
Hire a professional when:
- Your paint has deep scratches, heavy oxidation, or prior repair work.
- The vehicle is a luxury car, collectible, or has a factory finish you cannot risk.
- You need a warranty for resale or lease-return purposes.
- You do not own a polisher and do not want to learn paint correction on your own car.
A Middle Path
Many owners split the work: pay a professional for the strip, decontamination, and paint correction, then apply the coating themselves in a controlled garage. This captures the highest-risk, highest-skill portion at professional rates while saving on application labor.
Frequently Asked Questions
Can you reapply a ceramic coating to a car?
Yes, you can reapply automotive paint coatings, including ceramic coatings. Most coatings are designed to be reapplicable after the original layer degrades or shows signs of wear. The key is proper surface preparation, including removal of the old coating layer, decontamination, and paint correction before applying the new coat. Advanced hybrid resin coatings allow for repairs and reapplications even after severe damage, making them ideal for vehicle owners who want long-term protection without permanent commitment.
How do you know when a ceramic coating needs to be reapplied?
Several signs indicate your coating needs reapplication: water no longer beads on the surface, oxidation or dull spots appear, swirl marks become visible, or the coating has lost its hydrophobic properties. In desert climates with intense UV exposure, coatings may need refreshing depending on the coating type and your vehicle's exposure. Testing water beading behavior is the quickest way to assess whether your coating still provides adequate protection.
What's the difference between refreshing and reapplying a ceramic coating?
A ceramic coating refresh typically involves applying a new thin layer over an existing coating that still has some bonding integrity, without removing the old layer completely. Reapplying means fully removing the old coating, preparing the surface to bare clear coat, and applying a completely new coating system. Reapplication provides superior bonding and durability, especially if the old coating has failed. Refresh is faster and less expensive but may not restore full protection if the underlying coating is compromised.
Do you need to remove old ceramic coating before applying new coating?
It depends on the coating's condition and the type of reapplication you're doing. If you're doing a full reapplication for maximum durability and bonding, removing the old coating is recommended. However, some advanced coating systems allow layering new coatings over existing ones if the old layer still has structural integrity. Removing old coating ensures better surface tension, chemical compatibility, and long-term adhesion. Professional assessment of your current coating's condition will determine whether removal is necessary.


